Consider constructing a standalone outside wall to add a patio to your new design, a build of patio seating wall provides a bit of privacy and acts as a ledge for seating.
Even though they seem challenging, these are easy to execute with a little knowledge, skill, and hard work or you can hire a landscaper to do it for you.
This post will demonstrate one method for constructing a block patio sitting wall.
Various choices to build a patio seating wall are available depending on the materials, site conditions, patio enclosure, and individual preferences.
What is a Patio Seating Wall?
A patio sitting wall can provide a unique element to a standard patio design.
It gives a hardscape that would otherwise be flat some verticality.
Intrigue can also be added by using wall materials that contrast but work well together.
Although they are beautiful, they also provide extra seating, which is useful.
Since these hardscape elements are frequently positioned along the patio boundary, more seating alternatives are desirable but they also free up space.
These unassuming landscape structures are occasionally utilized to build two discrete areas inside a larger area like a large patio by patio seating wall.
Purpose Of a Patio Seating Wall:
They are quite important if you want to create an outdoor living space that you can use and enjoy to the fullest.
Even if a retaining wall is not necessary, a patio sitting wall can be built only for aesthetic purposes and seating.
This wall might be a welcome addition to your outdoor living area that helps you make better use of and enjoy your space.
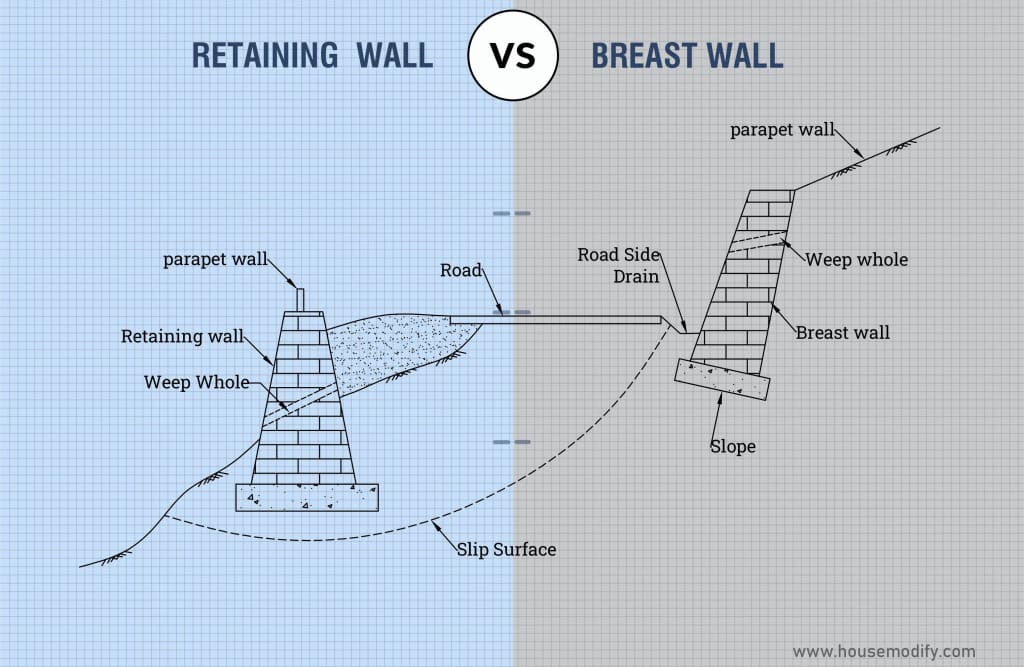
A seat wall is a fantastic way to “double the value” of a retaining wall. Retaining walls are frequently required to control erosion.
It is occasionally possible to use a retaining wall as seating if it is located in a common area next to and around a patio or a pool.
But some property owners choose a sitting wall even if they don’t require erosion control.
A short wall enclosing the patio could be a great way to add “overflow seating” if you’re hosting an event and all of the chairs or couches are taken.

Materials Required to Build a Patio Seating Wall:
The material you choose for the walls will depend on the sort of patio.
Concrete or stone blocks that complement the pavers on the patio can be used to create a seating wall.
The topping for block walls could be made of bluestone or even more blocks.
Stone walls should be topped with bluestone or limestone.
A brick patio design is complemented by seat walls made of brick or sandstone with bluestone or marble crowns.
For concrete patios, a sitting wall can be made out of almost anything.
Stone, brick, or concrete Allan blocks will all work because the majority of concrete designs aren’t overly crowded.
Make sure the hues work well together.
Stone comes in several varieties that can be utilized as building materials.
Even if you don’t have a large plot to mark off, your patios and flower beds still need a border, and a border that also serves as a seating area will improve the aesthetic appeal of your yard.
But there’s no need to dig up the yard looking for pebbles.
Steps To Build a Patio Seating Wall:
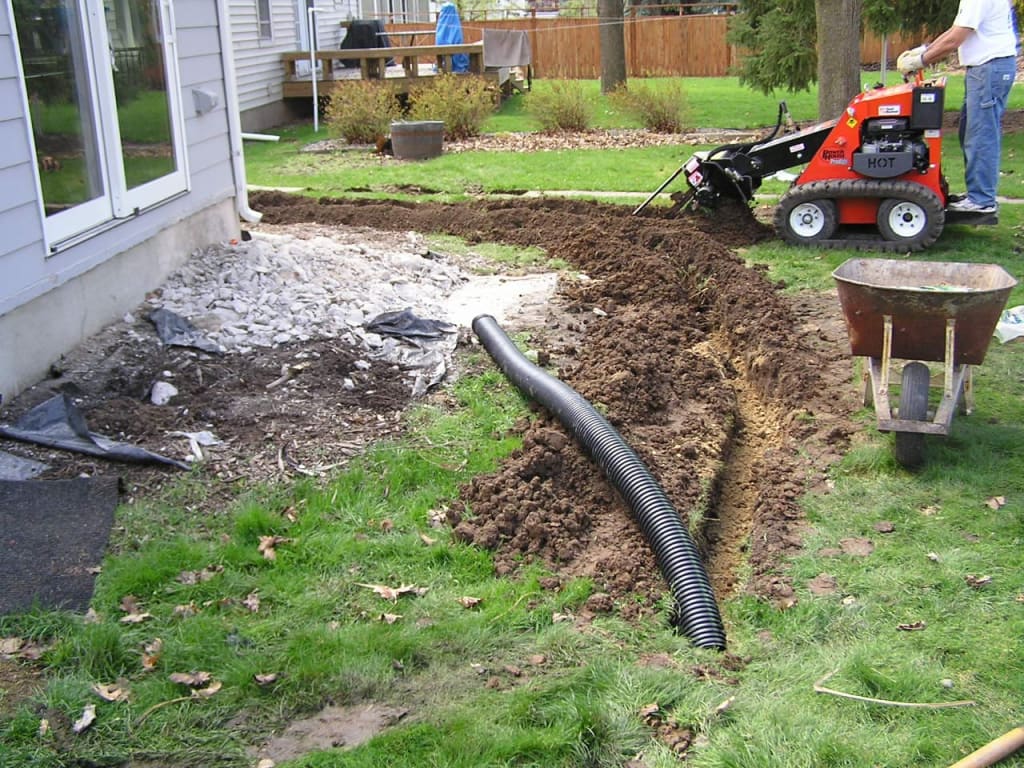
Layout and excavation of the area:

Before putting the blocks together, dig a trench since the patio seating wall’s first course must be at least partially submerged for stability.
Allow at least 1 inch of backfill on either side of the blocks to prevent the wall from tilting when the ground settles.
After the trench has been laid out, a level line can be used as a reference point to measure its depth.
Sketch out the size and shape of the ditch using the stones that have been positioned at the patio’s sitting wall’s opposing edges as a guide.
On each side of the rocks, at least 1 inch should be added, place a stake at either end.
Level of string a line:

Place a level on a mason’s line that has been stretched between the stakes.
Instead of connecting the rope to the stakes, nick each and knot the string in the notches.
This way, you can unhook the rope as needed for digging without having to tie it.
Dig a trench:
Starting at the lowest point of any slope, create a trench at least six inches deep or use a spade to dig down until you reach the softer soil beneath the loamy topsoil.
Keep the base of the trench level while you excavate the area by measuring off the level line to build the patio seating wall.
Set the base:

The stones are set atop a strong, densely packed base made of a ground mixture known as a paver base.
You can extend the depth of the remaining trench to almost half the thickness of your stone by layering and compacting the dirt.
Shovel three inches of the paver’s base into the trench.
Apply a hand tamper:

A hand tamper is used to compact the base.
To ensure that the floor remains level, measure the distance from the foot to the level line.
Pour additional base layers of paver bottom as necessary, tamping each one so that the surface is half an inch above ground level at the lowest point of the slope.
Pour trench, shovel stone dust:

Add one inch of stone dust to the trench.
You can spread and level the stone dust by dragging a shovel over the uneven ground.
Assuming the foundation and stone dust are included, make sure the finished length of the trench is half a stone’s width at its shallowest point.
Lay the first course:

For a level and strong wall, the first course’s placement is essential.
A first course that is inclined will cause the block piled on top of it to lean, while one that is gapped will cause the remaining portions to be out of alignment.
If your area is sloped, start placing the stones at the top of the trench and work your way down to avoid eliminating any stone dust.
The ditch in the centre of the sides should receive the first stone.
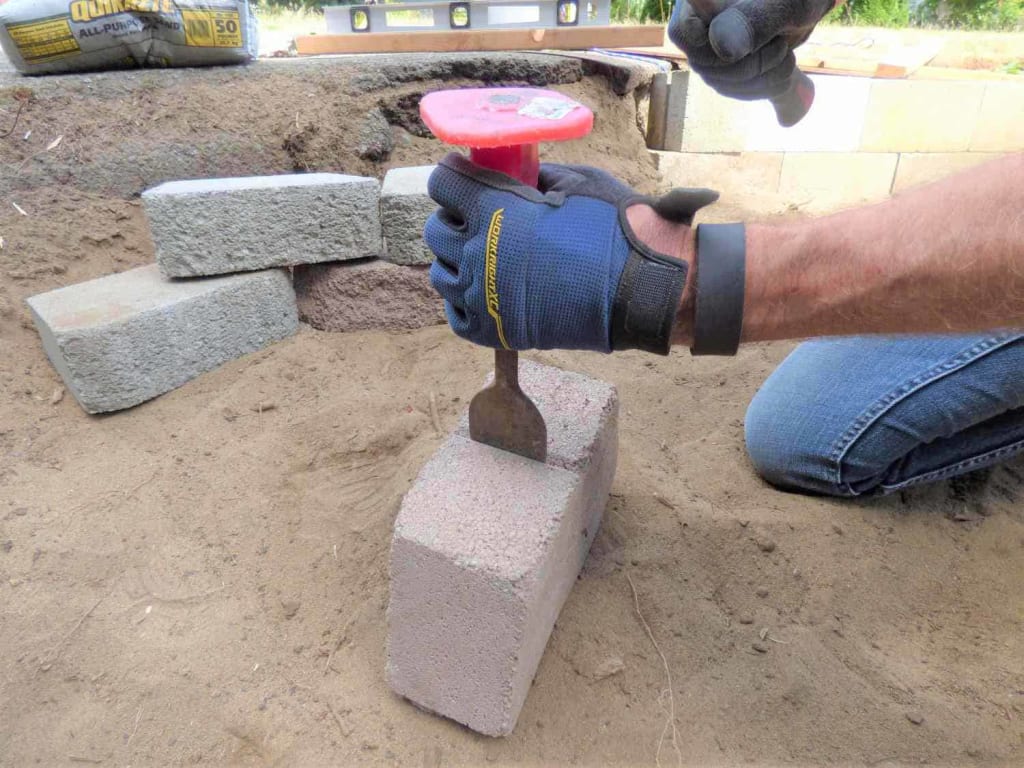
Check the stone’s edges, corners, and front from the rear using a four-foot level.
To set the stone, tap it with a rubber mallet.
It is time to set the following stone.
Make sure it is flat with the neighbouring rock and level in all directions before setting it with the mallet.
Set the initial path build in this manner until you reach the patio seating wall end.
Fill in the spaces:

Using a shovel, fill up any openings between the blocks’ ends with additional stone dust and soil.
Be careful not to loosen the stones as you step on the dirt to compact them.
To prevent dragging stone dust into the joint, drop a stone against an adjacent stone straight down.
Cut the end stones:
To provide wall strength, the joints between the courses must be spaced apart.
Starting with a half stone, the second row of the wall should be constructed to align the joints evenly.
At the spot where the block will be cut with a mason’s chisel, mark and scrape either side of the block.
With a wide mason’s chisel, cut off the scoring at an angle from the side to create a narrow channel.
Built the wall:

A comfortable seating height for a wall can be found between 17- and 23-inches including capstones.
Most cast concrete stones are substantial enough to stand alone.
To ensure safety, you should use stonework construction adhesive to glue down at least all other courses and the capstones.
Apply masonry construction glue in two lines around the upper edge of the first course of stones using a caulking gun.
With the joints spaced evenly, layer the second session on top of the first.
Stack the courses:

Courses should be stacked until the wall is a few inches below the required height.
Apply two beads of masonry adhesive to the final course and then position the capstones.
Turn them upright to overhang the sides of the wall to create a finished top.
Improve the Appearance of the Seat Wall:

Even though this wasn’t a part of the outdoor design process, we encouraged you to add blankets, pillows, or cushions to your seating walls to make them more comfortable.
We’ve observed homeowners doing this after finishing their landscaping project, and we can see how it contributes to the area’s overall appearance.
It can brighten things up and improve seating comfort!
FAQ- How To Build a Patio Seating Wall:
Q1. What height is ideal for a sitting wall?
A wall should be between 18 and 24 inches tall including capstones to be comfortable to sit on.
Most cast concrete stones are substantial enough to support themselves.
Q2. What is the patio seat wall’s width?
Any size can be used for seating walls.
They range in height from 18 to 24 inches.
Most range in width from 12 to 18 inches.
You can choose to make some pint-sized if you frequently have young children in your vicinity.
Q3. What does a covered patio add in terms of value to your house?
An ROI of more than 80% is reportedly produced by well-designed patios to an estimated 8–10% increase in property value.
For most homeowners, it would be preferable to paint or repair an existing patio, as repair costs typically range from $1,400 to $2,000.
This has a potential ROI of around 500%.
Conclusion:
Without putting more furniture in the room, a patio seating wall is a fantastic build solution to improve the seating which might be a necessity in a small space.
They can be a great approach to increase the number of people you can involve in your community in this way!
Building a patio seating wall is simple.
Now, you can construct it without using a building wall panel or any other wall panels.