Any landscape is enhanced by the build of a retaining wall on a slope, as these barriers can stop flooding and reduce soil erosion.
These walls also offer various additional benefits and planning can alter circumstances, but it is still feasible.
Using the knowledge, we have learned from our research, we’ll walk you through the process of building your retaining wall on a slope in this step-by-step manual.
So, Let’s begin!
Step By Step Procedure to Build a Retaining Wall on a Slope:
These guidelines will demonstrate to construct the interlocking block retaining wall.
Before you begin gather a variety of tools, safety gear, and building materials.
For this activity, wear gloves and safety glasses.
Now that you’ve gathered all your resources let’s take a closer look at the process of building your wall as follows:
1. Dig a step trench:
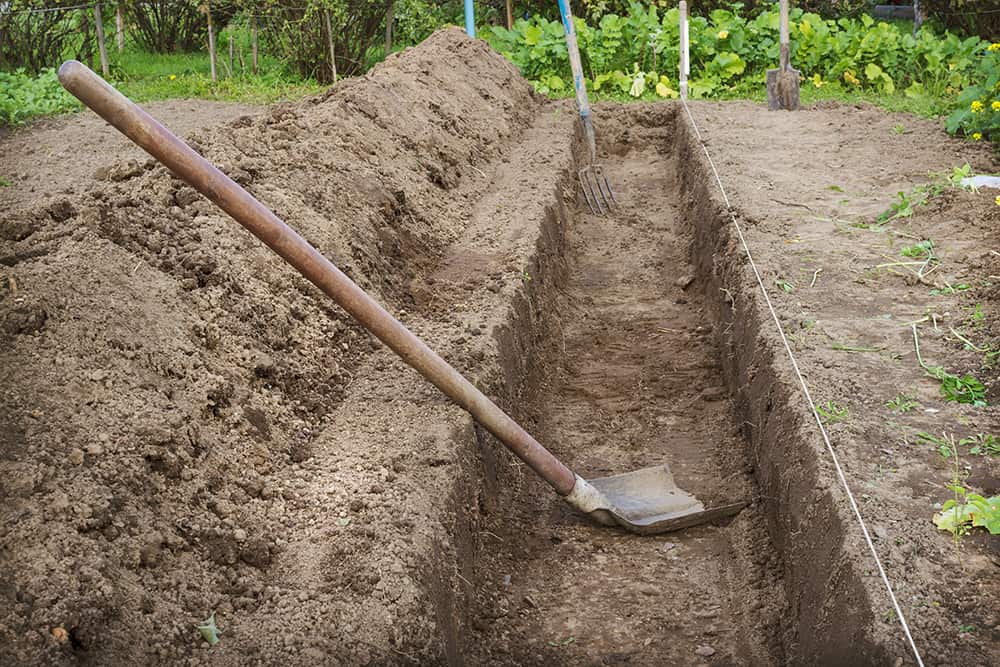
Make a line to follow on the ground to start.
This line doesn’t need to be accurate; it only needs to give you a general direction while you dig your trench.
Make the trench twice as wide as the depth of your blocks by digging it.
A minimum of half the height of your blocks, plus six inches of gravel should be the depth of the trench.
When working on a sloped area you need to dig a step trench, these steps allow for flat rows of blocks on sloping terrain.
2. Gravel base:
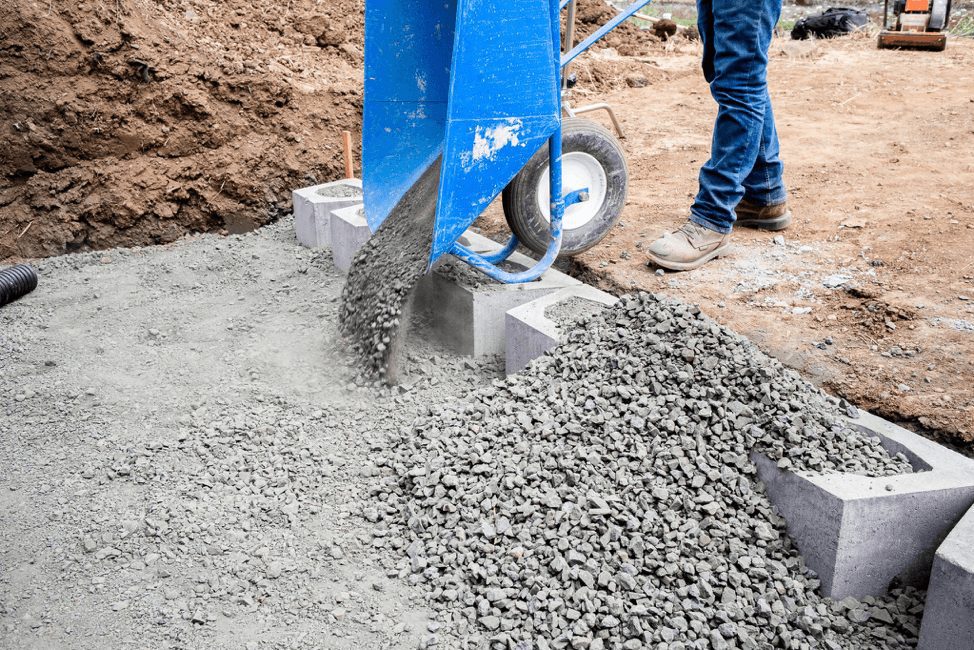
When you finish digging the stepped trench, you will begin laying the packed gravel foundation.
Smooth and compacted gravel for footing should be 6 inches deep.
Fill your gravel base in rows if you’re building on a slope or hill.
Start digging the next section of your trench once you’ve put in your first row of blocks and your gravel base.
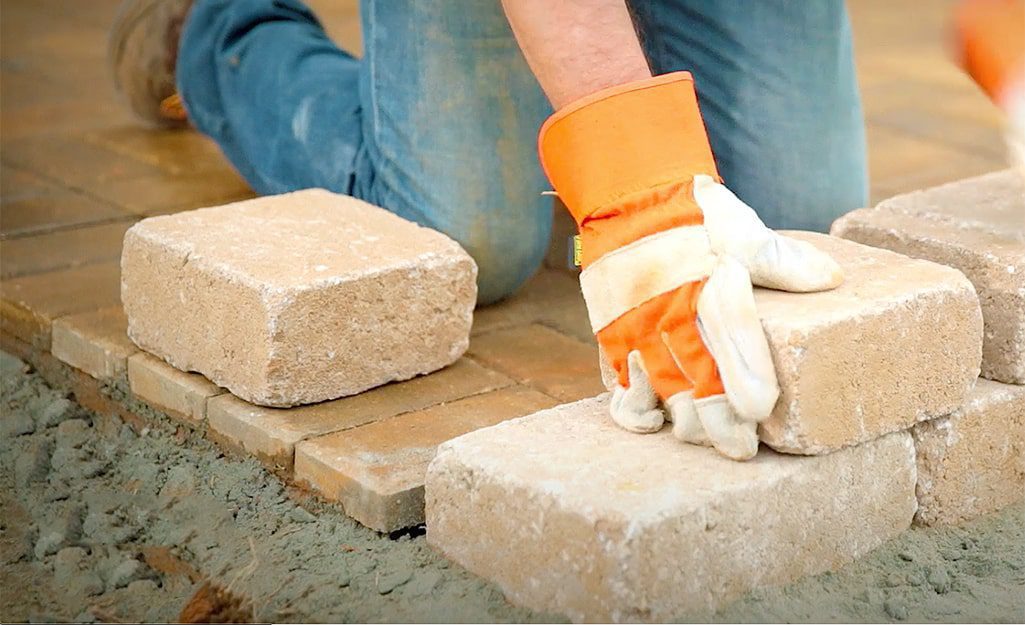
3. Set up the first row of blocks:
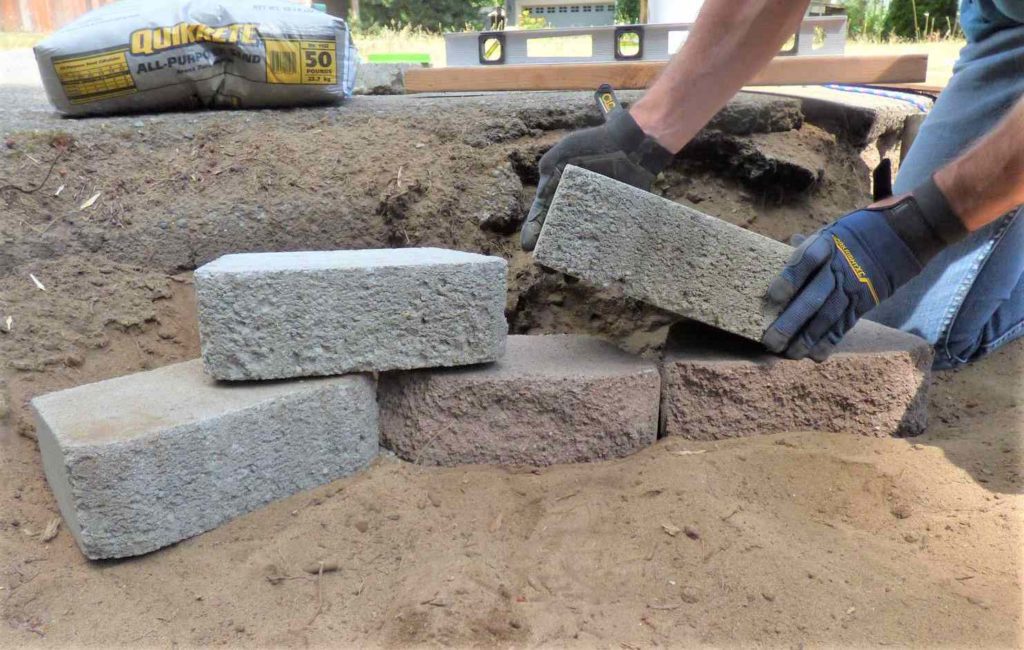
Place the first row of blocks on top of a base made of compacted gravel to build a retaining wall on a slope.
One brick at a time, being sure to level the one before it on all sides.
This row is the foundation of your wall that must be carefully finished.
There is no going back and fixing these barriers.
4. Coarse gravel:
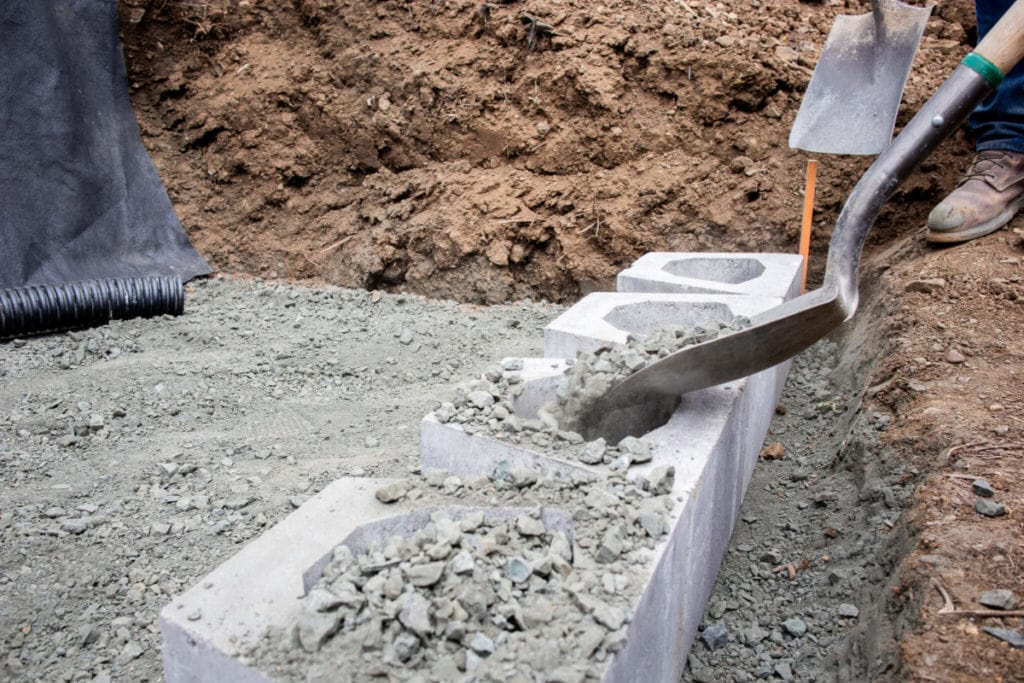
After your first row of blocks is set and levelled you will see your trench wall and the space between your blocks.
This region will be filled with coarse gravel.
This gravel will be loose in contrast to your gravel basis.
Fill the front of your first row of blocks with dirt.
The gravel behind your blocks and the dirt in front of them work together to keep them in place.
5. Install the final layer of blocks:
The hardest part is the base layers of the retaining wall on a slope.
You can install the other block layers after these are put in place.
As you add the blocks one at a time, space out the seam.
A tight fit between the blocks and the absence of any dirt or rocks between the layers should be ensured.
Continue to add gravel to the drainage area behind your block rows as you go.
6. Secure top-row blocks:
The top row of your blocks will be joined together using construction adhesive.
Each block should be flipped over to the top layer, adhered and then repositioned.
Keep dirt and rocks away from the gap.
7. Backfill:
You’ll fill the area behind these blocks once you’ve finished installing and sealing your final row.
At this point, you will swap drainage gravel for dirt.
Your landscape should be neat and ready for planting grass as well as other plants.
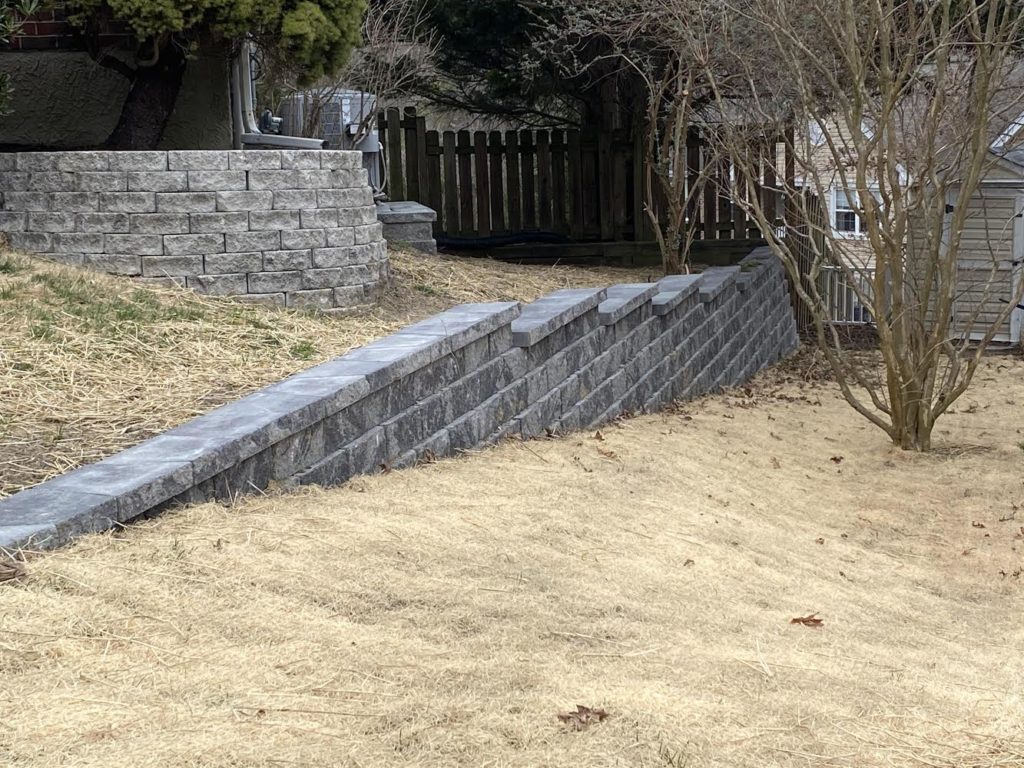
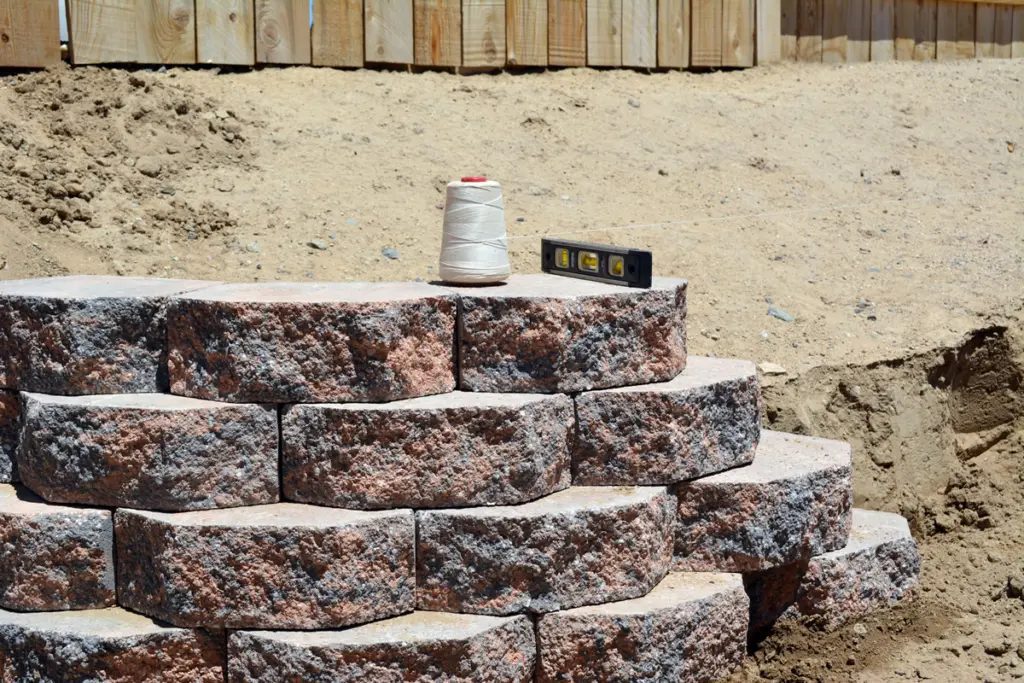
8. Add the Capstones:
Although not required, capstones give your wall a finished, polished look.
Most manufacturers produce capstones that complement wall blocks well, or you can use concrete pavers cut to fit, as we did here.
To hold the capstone in place, use construction adhesive.
How To Build a Retaining Wall on a Sloped Yard?
Following the guidelines given will allow you to construct a retaining wall on a sloped yard.
While working on slopes, some important details need to be paid close attention likewise when building on a sloped yard, you should dig your trench-like steps.
By doing this action, you can keep your blocks level and avoid further excavation on your slope.
You will finish laying the first layer of foundation gravel and blocks in one section of the trench before moving on to the next phase.
Each step-up requires a fully buried block.
Also read: How to Build Boulder Retaining Wall?
FAQ- How to Build a Retaining Wall on a Slope:
Q1. How to build a sloped concrete retaining wall?
Dig a hole and determine the level base.
Compress the base.
Level the foundation.
Place the base blocks.
Keep stacking the blocks.
Proceed with block stacking.
Backfill.
Q2. How can I construct a retaining wall on a slope using sleepers?
Dig a trench about a third of the depth of the sleeper to follow the path of your wall.
Place your sleepers in place and backfill the trench with a bottom layer of shingle, a thin layer of dry postmix concrete, and a layer of dry postmix after placing the shingle layer.
Q3. How can I create a retaining wall on a slope using wood?
The location of the wall should be drawn out.
Cut slope in,
Dig into the hill about 2 feet back with your shovel.
Set the retaining wall area.
Mark additional post locations.
Post pits should be dug and filled with gravel.
After setting the posts in the holes pour concrete.
Also read: How to Build a Cinder Block Retaining Wall?
Conclusion:
To build a retaining wall in your slope, you should adhere to these procedures.
Both flat terrain and slopes can be employed with this strategy.
When constructing on a slope or hill, keep those crucial considerations in mind.
The stepped trench and the foundation layer are the most crucial and difficult components, respectively.
Once a complete retaining wall is built as part of your environment, you may find it worthwhile.
We hope this post was helpful to you as you construct your wall.
Section Under: Retaining Walls