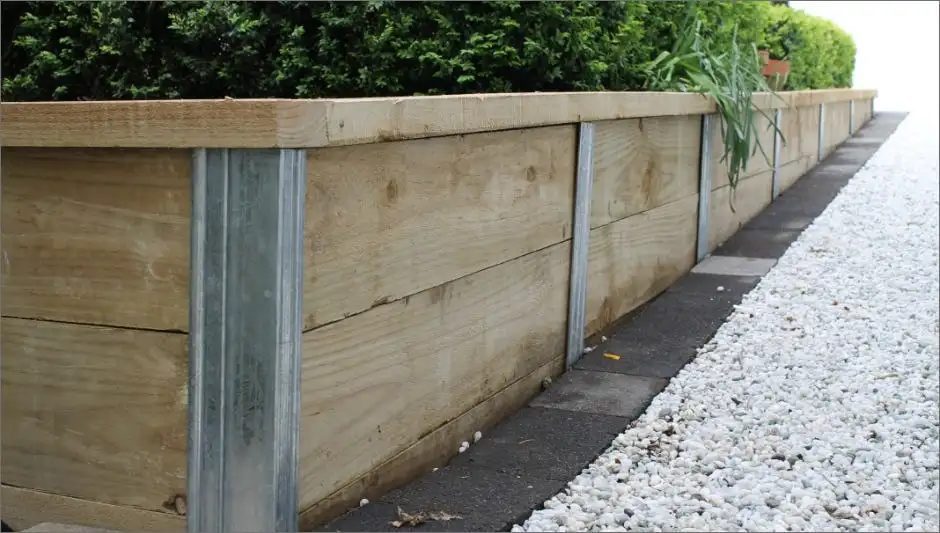
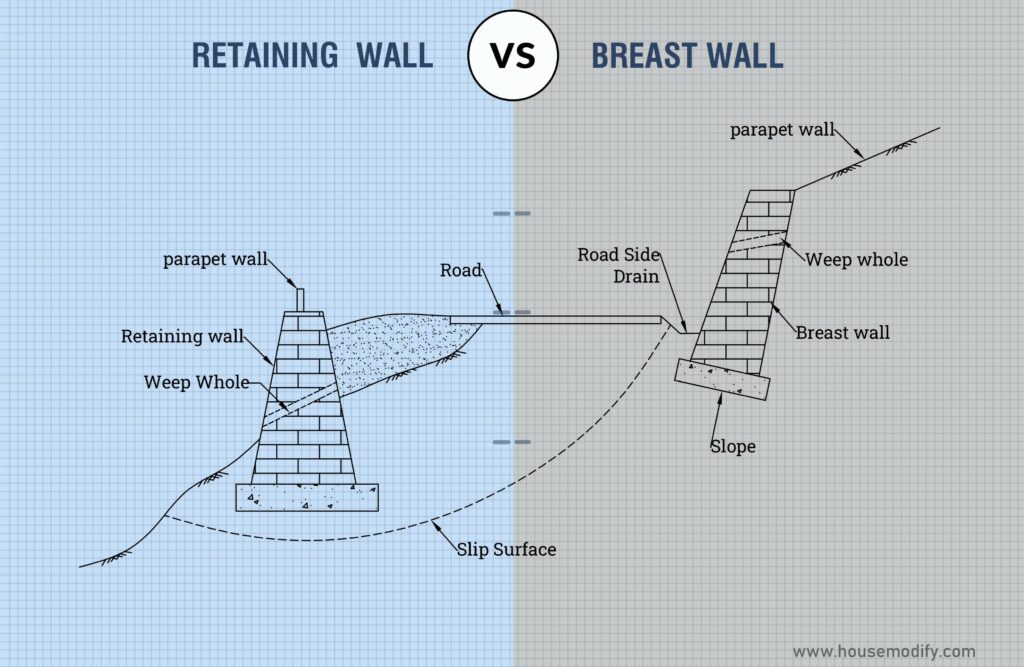
The construction of a retaining wall using a sleeper entails several steps.
The walled site needs to be precisely measured and marked.
After digging the trench and lowering the sleeper at a vertical angle, leave a space of at least 2 cm to allow water to pass through.
Set the trench in place after filling it with dry concrete.
What is Sleeper Retaining Wall?
A retaining wall made of wooden or concrete planks is known as a sleeper wall.
The wall is constructed to bind earth and soil that differs from the elevation underneath it.
The word “sleeper” derives from the wooden or concrete planks that are typically used to build railroad tracks, but sleeper retaining walls take it a step further by incorporating other materials.
For smaller walls, timber works well.
Types of Sleeper Retaining Walls:
1. Timber Sleepers:
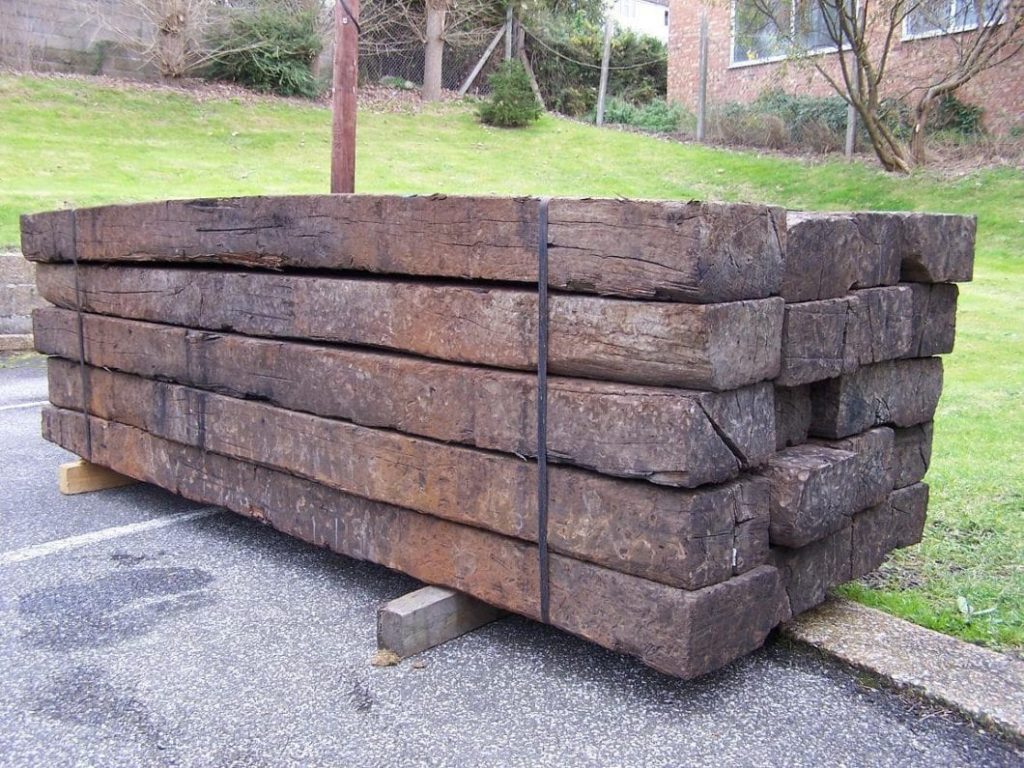
Timber sleepers were traditionally used in the construction of railway lines.
These sleepers do not last as long as concrete sleepers, which is a drawback.
They are vulnerable to moisture and decay.
To construct a timber sleeper retaining wall, a variety of timbers can be utilized, including:
- Regular timber.
- Treated timber.
- Recycled timber.
Retaining timber walls can be painted with modern technologies.
As a result, you can coordinate the retaining wall with your property’s surroundings or overall design.
2. Concrete Sleepers:
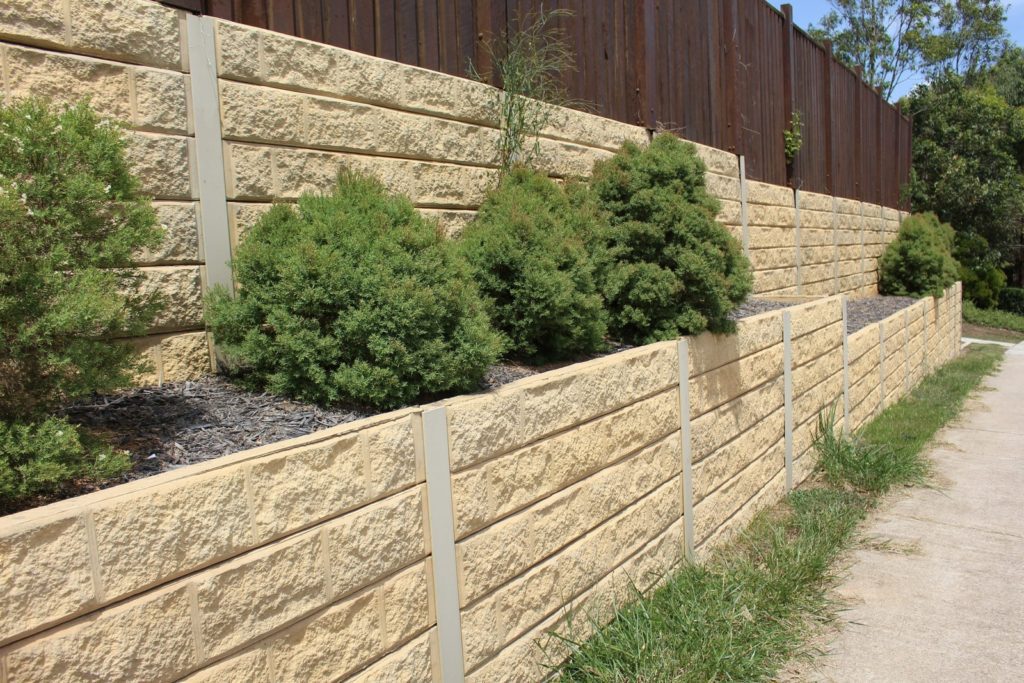
Concrete sleepers are perfect for building retaining walls.
In terms of texture and design, they are smoother.
You are no longer restricted to using the standard grey concrete because of the textures and styles that are accessible.
Concrete retaining walls can be used to enhance the curb appeal of your home.
How to Build a Railway Sleeper Retaining Wall?
Horizontal Sleeper Wall:
Step 1: Measure and mark the area:
The length of the wall will be fully determined by your personal preferences and the amount of available garden space.
To determine the appropriate length of your sleeper wall, use a tape measure.
String lines and pegs can be used to mark the region.
Step 2: Lay the foundation:
A level, freely draining foundation must be built.
Even though sleepers are strong, heavy pieces’ continual contact with ground moisture will harm the sleeper, leading to an unsteady sleeper retaining wall.
- With a shovel, create a trench along the length of your marked-output area that is twice as deep and 400mm wider than the width of your sleepers.
- Fill the trench with your scalping to a depth of around 500mm.
- Use your shovel to level up the surface and smooth it out.
- Pour wet cement into the trench, filling it to a depth of about 500mm, after mixing your cement according to the manufacturer’s instructions.
Step 3: Place the bottom sleeper:
- Well before the concrete hardens, take one of your sleepers, and pass through the widest, flattest side of the sleeper to the opposing side.
- Position the sleeper in the trench such that it is on its broadest, flattest side that the coach screws are pointing downward so they may go through the concrete.
- Check the base’s level using a spirit level.
- Adjustments must be made before the concrete hardens.
- Repeat step 4 as necessary along the whole length of the trench, using as many sleepers as necessary.
Step 4: Arrange the sleepers in a stack and secure them:
Simply overlap the joists in a brick-effect pattern to build a sturdy, interconnecting framework.
You have the choice of slicing your sleepers into smaller, uniform-sized chunks.
For a more brick-a-brack feel, you could also cut the sleepers to varied lengths.
- Over the base sleeper, stack the additional sleepers.
- Make sure the sleeper is aligned correctly with the base sleeper; the edges of each sleeper should be flush with one another.
- The sleepers are joined by driving stainless steel screws through the top of each sleeper and into the sleeper that it is sitting on top of.
- To firmly fasten the two sleepers together, space screws are approximately 500mm apart.
- Continue stacking and screwing the sleepers until you reach the proper wall height, overlapping the joist gaps as you go.
Step 5: Add final touches:
When the sleeper retaining wall construction is complete, you may give it your personal touches.
- Any gaps between the wall and the ground should be filled with scalpels or 10mm shingle pieces.
- Your sleepers could be treated, painted, or sanded down to achieve the desired aesthetic.
Vertical Sleeper Wall:
Step 1: Measure and mark the area:
Choose the location and shape of your upright sleeper wall.
Do you like a straight or curved edge?
- Determine the appropriate length of your sleeper wall using a tape measure.
- Using string lines and pegs, mark the area.
- If you’re building a curved wall, you might need a few more pegs to mark the direction and location of the curve.
Step 2: Cut your sleepers to a length:
An upright sleeper wall can be built to any desired depth or height.
Even better, vary things by building a wall that gradually slopes or varies in height as it goes.
- Calculate how many sleepers you’ll need to construct your wall’s length.
- Measure the sleeper’s width, then divide the necessary wall length by this amount to figure out how many sleepers you’ll need.
- Using a panel saw, adjust the height of your sleepers to the proper wall height, then put them aside.
Step 3: Lay the foundation:
To lower your upright sleepers, you must dig a free-draining trench.
- Use your string line as a guide to creating a trench using a shovel.
- One-third of the depth of your longest sleeper length or millimetres should be the minimum depth of your trench.
- Fill the trench with the scalping until it is about 500mm deep.
- Use your shovel to level up the surface and smooth it out.
Step 4: Bring the sleepers in closer:
You may start putting your sleepers in place so that your foundation is in place.
- Place each sleeper side by side and lower it vertically.
- To make a curved wall, you must slightly incline each sleeper until the desired curvature is produced.
- As soon as you’re happy with the sleeper retaining wall placement and appearance, pour a dry cement mixture into it.
- Use a hose or a buck to add water to the cement in the trench as instructed by the manufacturer.
- While the cement is drying, you can adjust each sleeper’s position more as necessary.
Step 5: Add final touches:
You might want to improve the wall’s ability to drain moisture or strengthen its structural integrity.
- On a straight wall, you can use PAR-treated wood to join the backs of the sleepers together to strengthen the wall.
- A curving wall can be strengthened by using metal strips or wire.
- Backfill the area with shingles or scalping to aid in water draining away from the wall.
- If you want the sleepers to have a planned finish, you can also paint, treat, or sand them down.
Advantages of Sleepers Retaining Wall:
The principal benefits of sleeper retaining walls are as follows:
1. Simple to Install:
A sleeper retaining wall is rather simple to erect, and with some training, you can do the task on your own.
2. Choices are possible:
You have the choice to choose the design from a variety of themes and textures.
To improve aesthetic appeal, even the concrete sleepers are now painted in a variety of colours.
Disadvantages of Sleeper Retaining Wall:
The principal drawbacks of sleeper retaining walls are as follows:
- Over time, wood may decay or deform.
- Not a DIY-friendly product because of their difficulty in handling, extreme weight, and potential for injury.
- Its wholesalers do not keep extra sleepers and posts in store, making supplies for modest projects difficult or expensive.
FAQ- Sleeper Retaining Wall:
Q1. what kind of sleepers should I use for a retaining wall?
Garden landscaping projects frequently use timber sleepers.
For retaining walls and other outdoor uses, they are traditional materials with an organic appearance (steps, decking, garden furniture, raised beds, etc).
Q2. How high may a sleeper retaining wall be?
To account for local ground conditions and loadings, sleeper walls greater than 1200mm in height must be designed by an engineer.
Q3. How much depth should a retaining wall made of sleepers have?
300 mm deep to allow for drainage.
After the concrete has had time to set, place the first sleeper and check alignment.
To make sure the sleeper is level, packing materials could be needed.
Conclusion:
You must first decide what you value more to choose between concrete and timber sleeper retaining wall.
It primarily comes down to cost and durability since both varieties of retaining walls have their visual charm.
Concrete is the best option if you’re willing to pay more upfront for a retaining wall that will last longer and require less upkeep.
Timber is better if you’re on a tighter budget and need something that takes up less room.
Section Under: Retaining Walls

I appreciate you mentioning how concrete sleepers are ideal for constructing retaining walls. This can be used, as you stated, to improve the curb appeal of her house. This looks like an excellent option to check out for my sister’s house since she has been looking for methods to enhance the appearance of her home. I’ll be sure to let her know about this and look into concrete sleeper retaining wall services that can be of help to her.