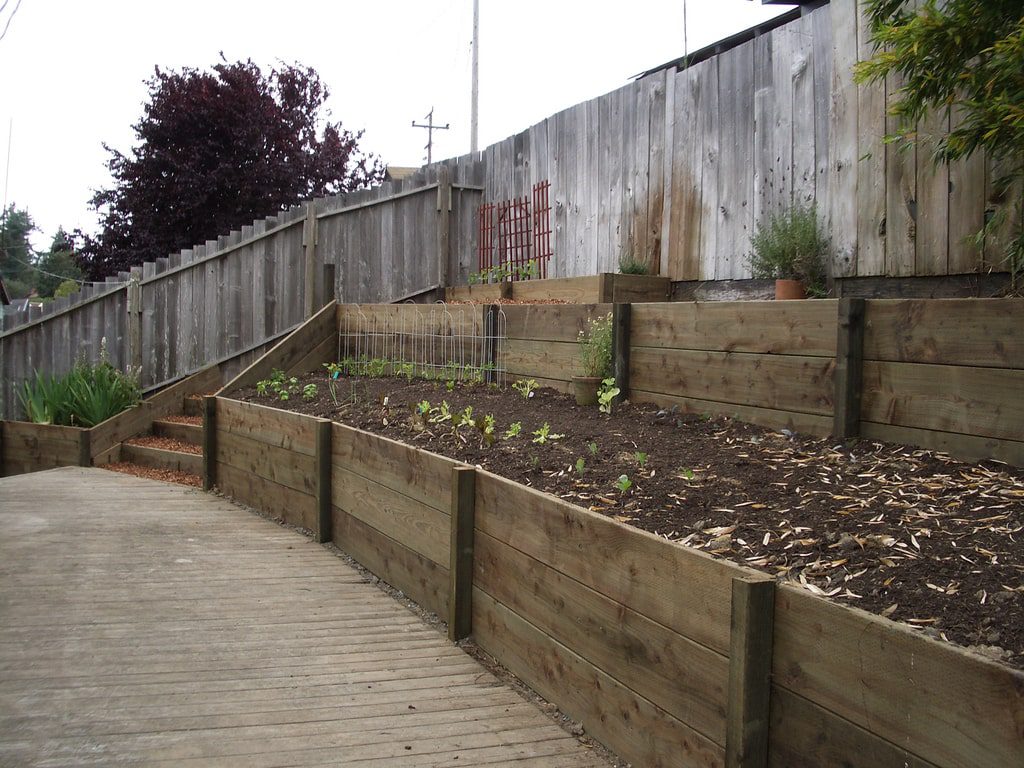
Your property slope can be levelled and build with level areas for roads, gardens, paver patios, kids’ play zones and decks by the wood retaining wall.
Retaining walls help to keep dirt and vegetation from encroaching on existing structures.
The excessively heavy materials can make it challenging to construct retaining walls constructed of thick timbers or masonry retaining wall blocks.
As long as the height of the retained soil remains reasonably uncertain, you can build another style of wood retaining wall utilising less-heavy dimensional pressure-treated lumber.
Try them out!
What is required to Build a Wood Retaining Wall?
Equipment/Tools:
- A manual post-hole digger or auger.
- Hammer.
- A Shovel.
- Power circular or mitre saws.
- Bubble level.
- Laser level.
- Measurement tape.
Materials:
- (4) two-by-six pressure-treated lumber boards, each 8 feet long.
- (6) two-by-eight pressure-treated lumber boards, each 8 feet long.
- (2) two-by-six pressure-treated lumber boards, each 8 feet long.
- (8) bags of 50-pound fast-setting concrete mix.
- (8) 0.8-cubic-foot bags of 7/8-inch drainage rock.
- (2) wood stakes.
- Scrap two-by-fours.
- Ordinary twine or yellow braided nylon mason line.
- 16d hot-dipped galvanized nails.
- Wood preservative.
11 Steps to Build a Retaining Wall:
These steps will result in a straight 16-foot long & 24-inch-high wood retaining wall.
The technique utilized can be used to build low walls up to 30 inches tall, while taller walls call for a new kind of framework.
Use only pressure-treated lumber approved for ground contact to ensure durability.
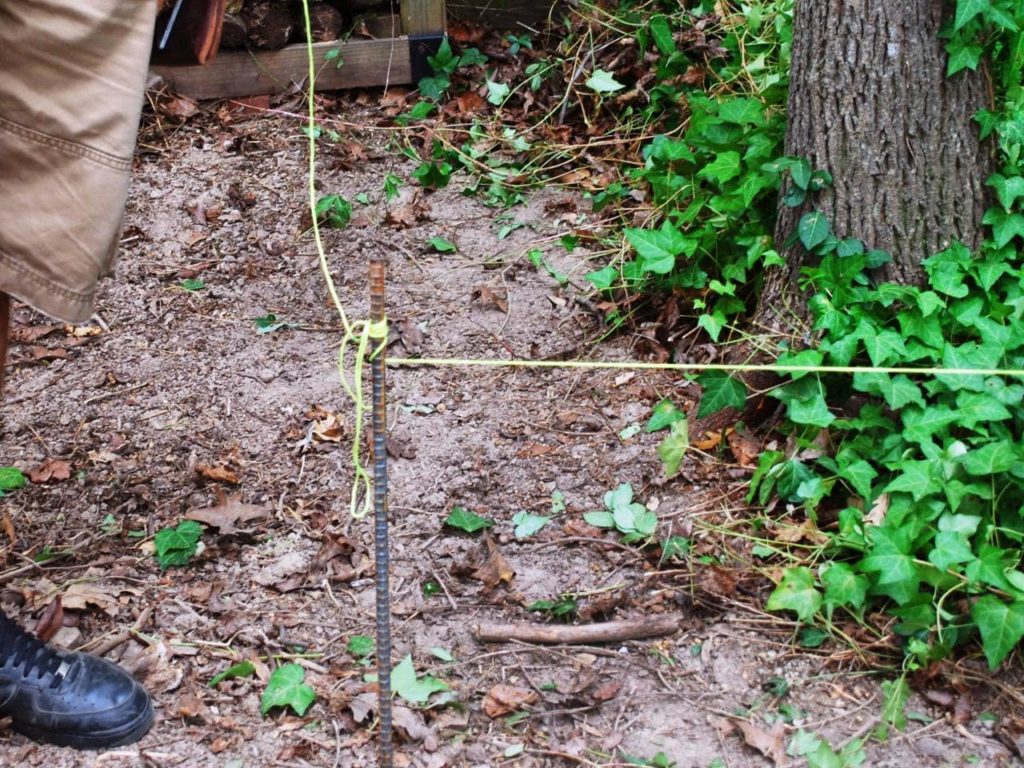
1. Retaining wall plan:
Mark the spot where you intend to erect the wall.
Place a post at one end of the wall and then drive a second spike 186.5 inches distant if you want to extend the wall beyond 16 feet.
As you transfer the line from one stake to the next, pull it taut.
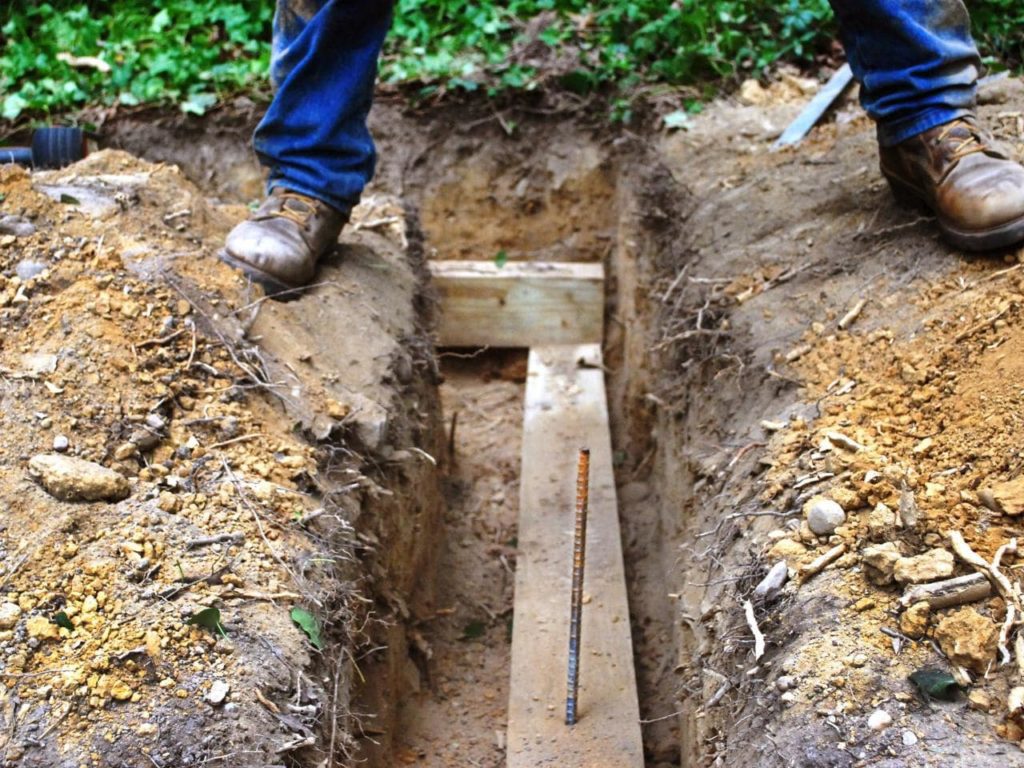
2. Cut into Slope:
Back into the slope with your shovel about 2 feet.
You aren’t digging down, only sideways and you must dig far enough to give yourself ample room to work on the retaining wall.
At the same time, you need to add additional gravel backfill as you remove more soil.
3. Prepare the Retaining Wall Area:
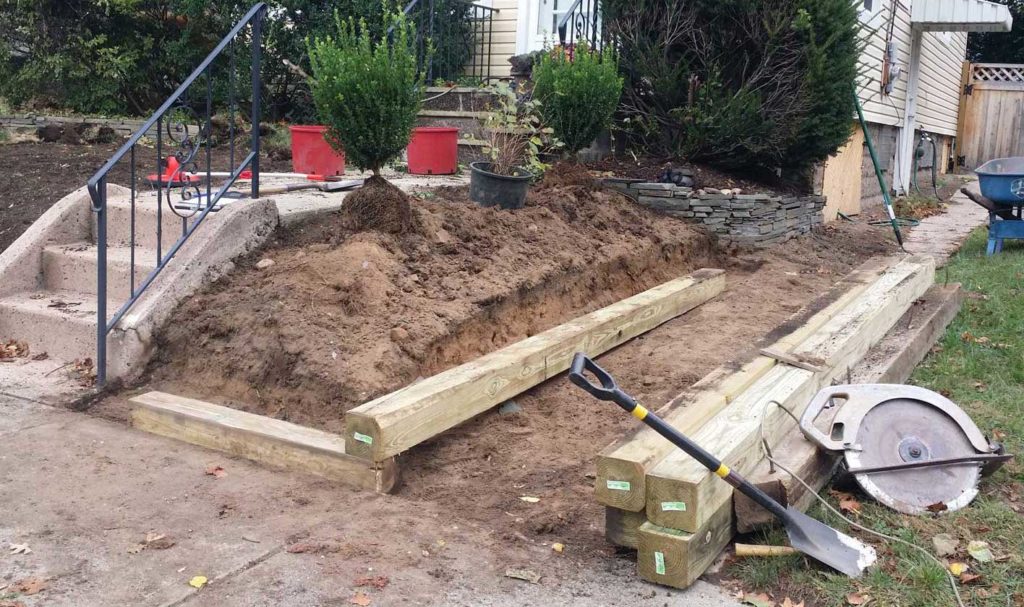
Follow the line with your shovel as you create a 5-inch-deep grove for the retaining wall to sit in.
By placing one of the boards with the bubble level on top and levelling it, ensure that the groove is level from end to end.
To smooth out the groove or replace the soil in other places, a flat-bladed shovel or spade is the perfect breadth.
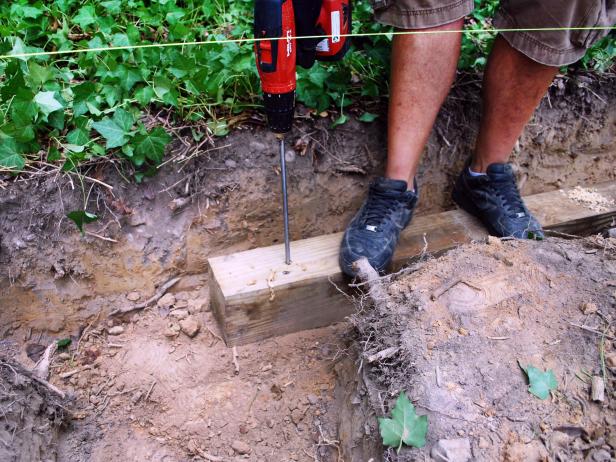
4. Mark Additional Posting Sites:
Between the two end stakes, drive six additional stakes.
Following the twine, the stakes should be evenly placed apart from one another or around 2 feet in the centre.
Eight stakes should now be in a straight line, each two feet apart from the stake next to it.
The centre of each stake corresponds to the location of a post hole.
5. Post-Hole Excavation:
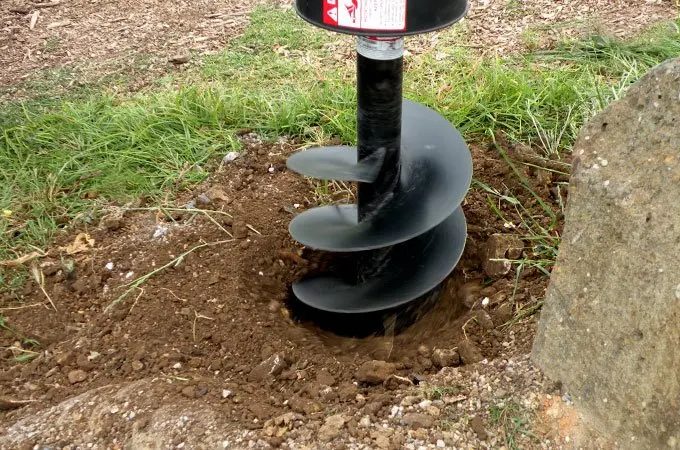
For wood retaining walls, it is generally recommended that the height of the soil being held back be roughly equal to the depth of the post holes.
You will need to dig down 24 inches to make room for the post’s depth and a further 4 inches to make room for a bed of landscape gravel.
The four-by-four post holes should have a diameter of 12 inches.
Remove each stake one at a time, then use a post-hole auger or manual digger (clamshell digger) to create a hole at each stake’s location.
Check the depth of each hole with your tape measure to make sure it is 28 inches.
6. Put gravel in the potholes:
Each post hole should have 4 inches of gravel at the bottom.
Don’t allow dirt to go inside the holes.
One bag of gravel should be able to be spread out between every two holes.
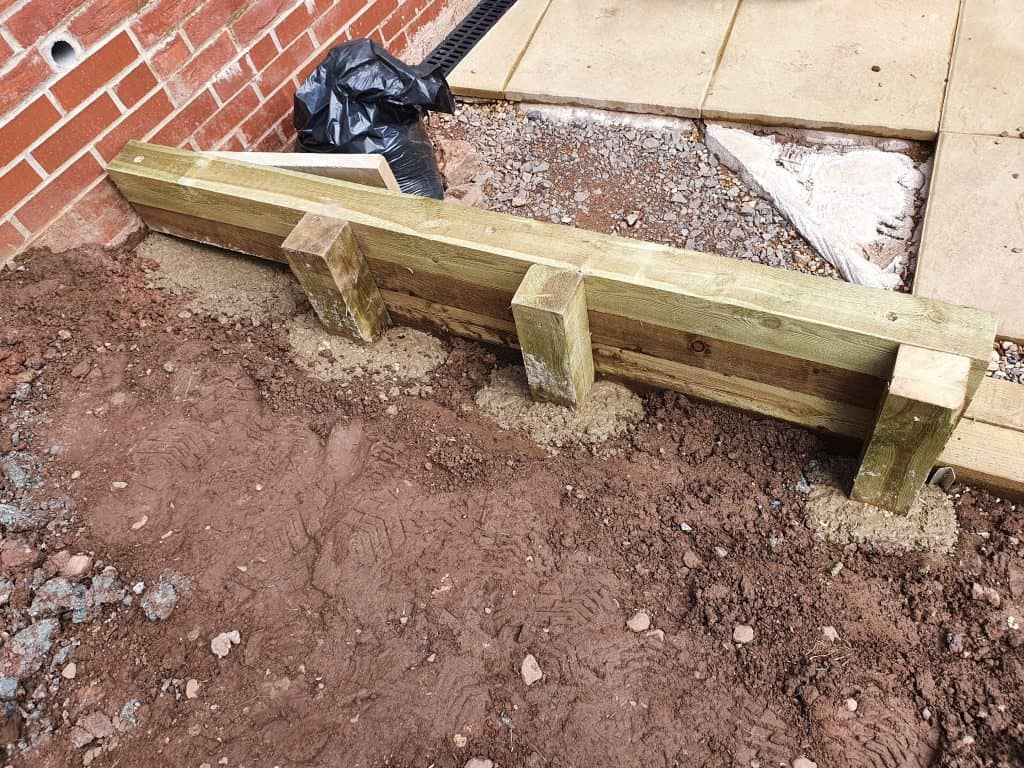
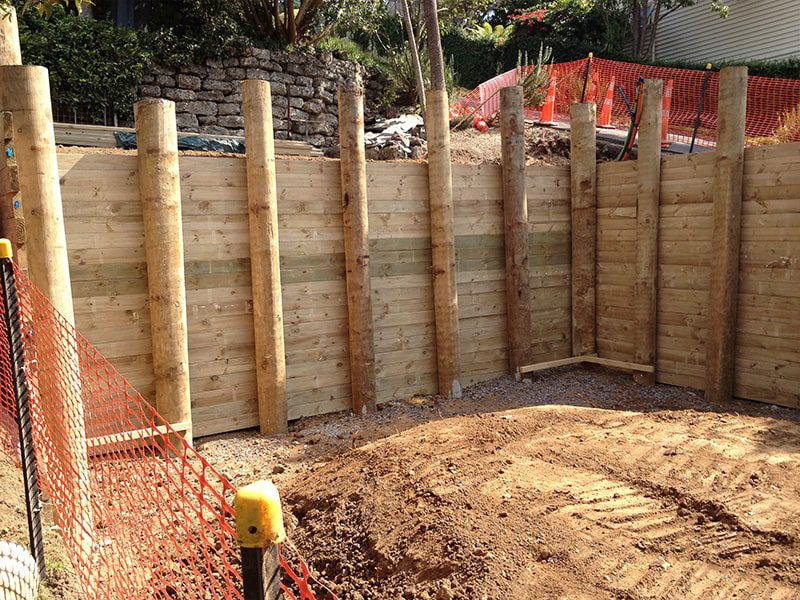
7. Install Posts into Holes:
To create eight posts, each measuring 4 feet, cut each two-by-six post in half.
Apply wood preserver to the lumber’s cut ends.
In each hole, insert the posts.
Use the laser level to check each post individually to make sure it is plumb and aligned.
Stakes made out of scrap wood can be used to anchor them.
8. Pour Concrete:
According to the product’s instructions, fill the hole with the required amount of water and one bag of dry quick-set concrete.
Leave the pegs made out of leftover lumber in place until the concrete has dried before moving on to the following post.
Fast-setting concrete cures in 30 to 40 minutes on average.
Even so, it’s typically recommended to wait at least four hours for the concrete to properly harden.
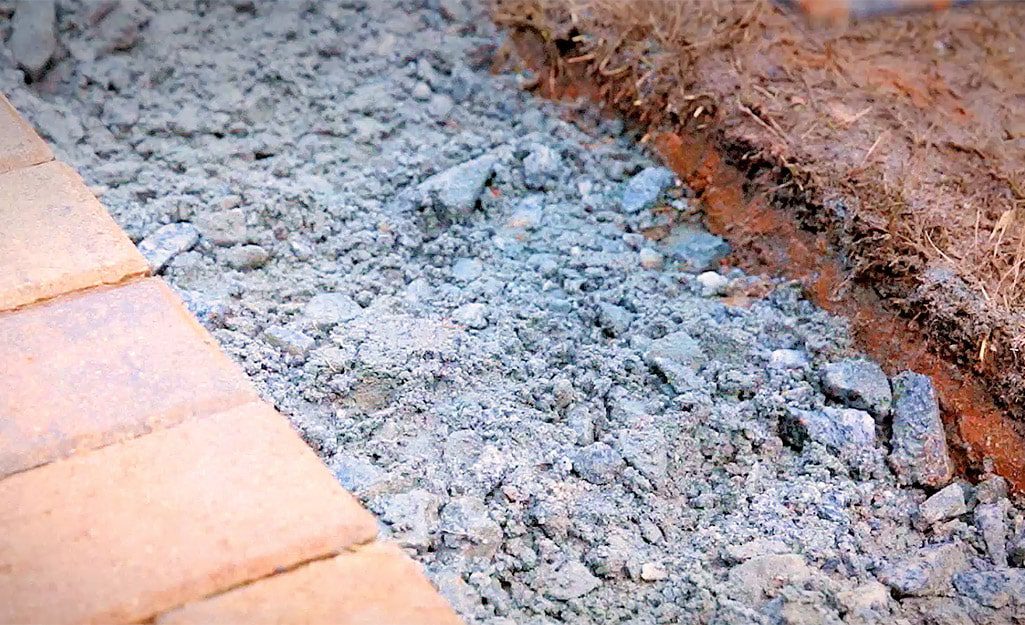
9. Add Gravel Under the Wall:
Fill the groove with two inches of gravel where the wall will rest.
The gravel will aid in water drainage and stop the wood from deteriorating too soon.
In a short amount of time, water may quickly wick through the wood and harm the entire retaining wall.
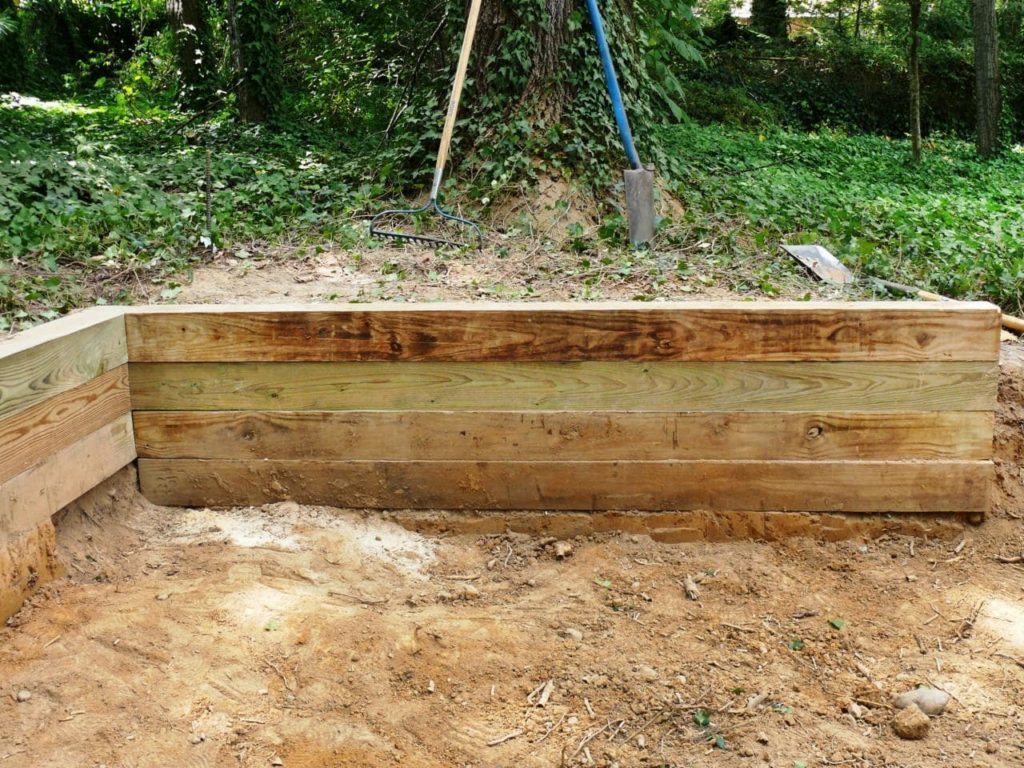
10. Set up Retaining Wall Boards:
Install three horizontal rows of two-by-eights behind the posts, working your way down from the top.
Use two 16d nails to affix a two-by-eight to each post, making sure to drive the nails through the boards’ slope side into the posts.
It is ideal for the top row of boards to meet the tops of the posts flush.
Utilizing two-by-six boards, erect the bottom row’s final row of boards.
This row’s bottom edge will be situated around 2 inches below the surface of the earth.
11. Wall Backfill Slope:
The remaining bags of landscape gravel should be uniformly distributed along the bottom of the retaining wall on the slope side.
Along the bottom of the wall, the gravel helps to improve drainage.
Add more soil to the cavity, filling the remaining space.
It’s crucial to backfill using gravel rather than dirt or even soil plus gravel.
If soil is used as a backfill, it will unavoidably grow wet and overly heavy, possibly causing the retaining wall to collapse.
Fundamentals of Wood Retaining Walls:
A low wood retaining wall does not require cumbersome tie-backs sunk into the slope, in contrast to typical four-by-four timber retaining walls.
Unlike stone walls, this wall does not rely on its weight alone together with a modest tilt to keep back the slope.
Instead, post holes are made in the same manner as fence post holes.
Pressure-treated boards are then fastened across the posts’ backs like the boards on a fence.
Safety Factors:
The soil behind the wall and the wall itself must not rise.
Height differences between 24 and 30 inches will put too much strain on the wall’s back that causes the wall to break and finally bend over.
For details on suggested retaining wall dimensions, contact your neighbourhood building department.
FAQ- How to Build a Wood Retaining Wall?
Q1. What kind of wood is ideal for a retaining wall?
A pressure-treated wood with a rating of at least 40 is your best choice.
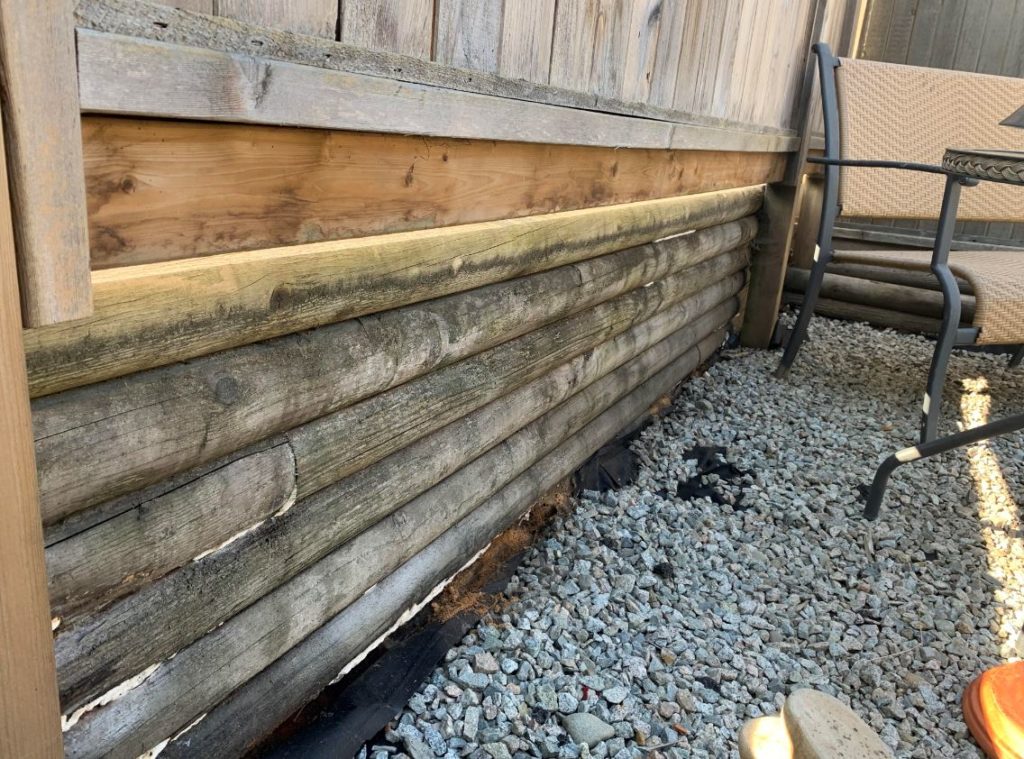
Avoid using railroad ties since they are cumbersome and covered with filthy creosote that can be harmful to plants.
Q2. Is drainage required behind a wood retaining wall?
Drainage along retaining walls is essential.
It makes sure that water doesn’t build up behind the wall and weaken it.
An excellent drainage system collects rainwater and directs it away from the wall.
It lessens strain on the soil within the wall around the foundation, which prevents erosion and settling.
Q3. What is the ideal spacing between posts for a wood retaining wall?
At least three feet should separate retaining wall posts.
If your measures are better served by a slightly longer or shorter distance, go for it.
However, ensure that your wall is strong enough, you shouldn’t space them more than seven feet apart.
Conclusion:
To prevent your topsoil from eroding down a hill, build a wood retaining wall.
In addition, you can make it into a terraced garden to grow everything from small trees and shrubs to flowers and vegetables.
Although constructing a wood retaining wall is not difficult and doesn’t require special abilities, you will need some patience and familiarity with basic equipment.
Section Under: Retaining Walls