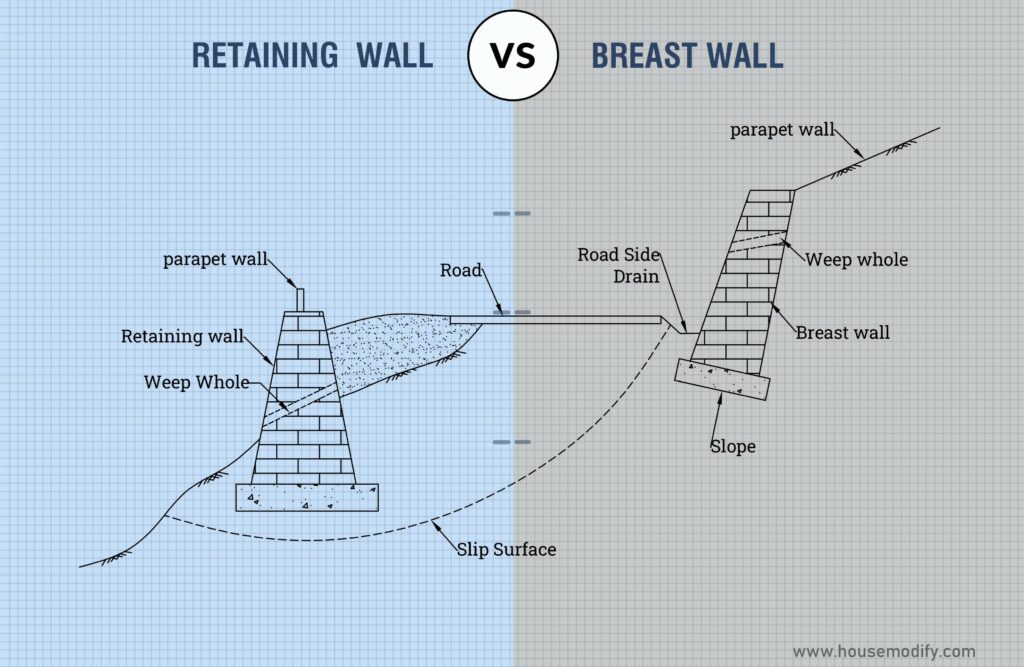
You want to build a retaining wall with geogrid because it is an excellent tool that will greatly increase the durability of your wall.
This article focuses on modest block retaining walls that many homeowners have built as do-it-yourself residential retaining wall projects.
These blocks can be moved by hand and do not require any machinery.
So, Let’s get started!
What is Geogrid Retaining Wall?
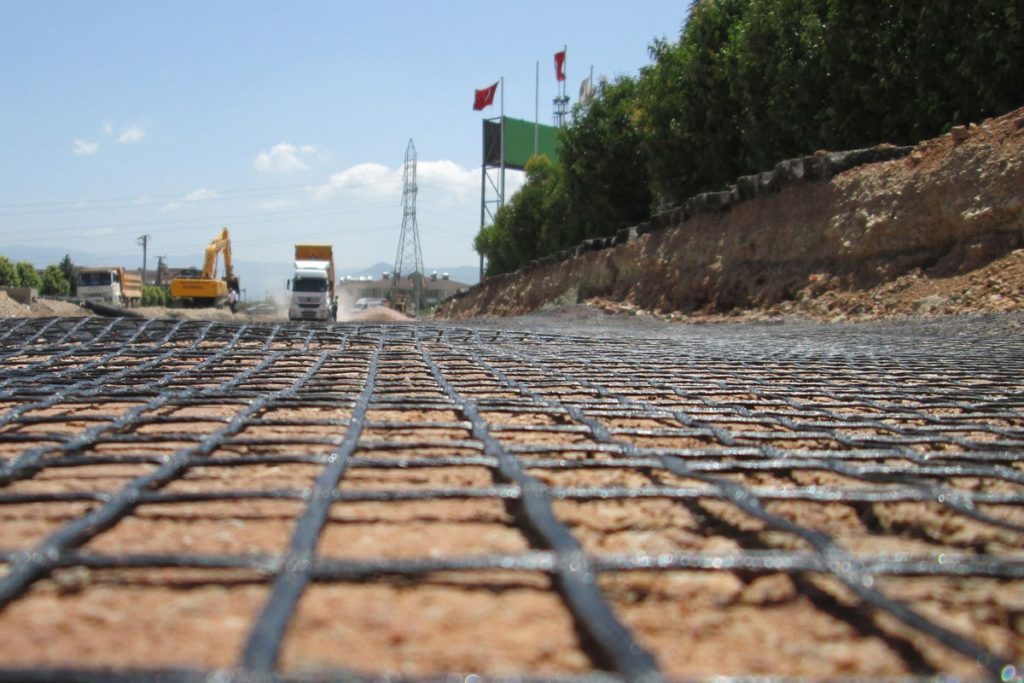
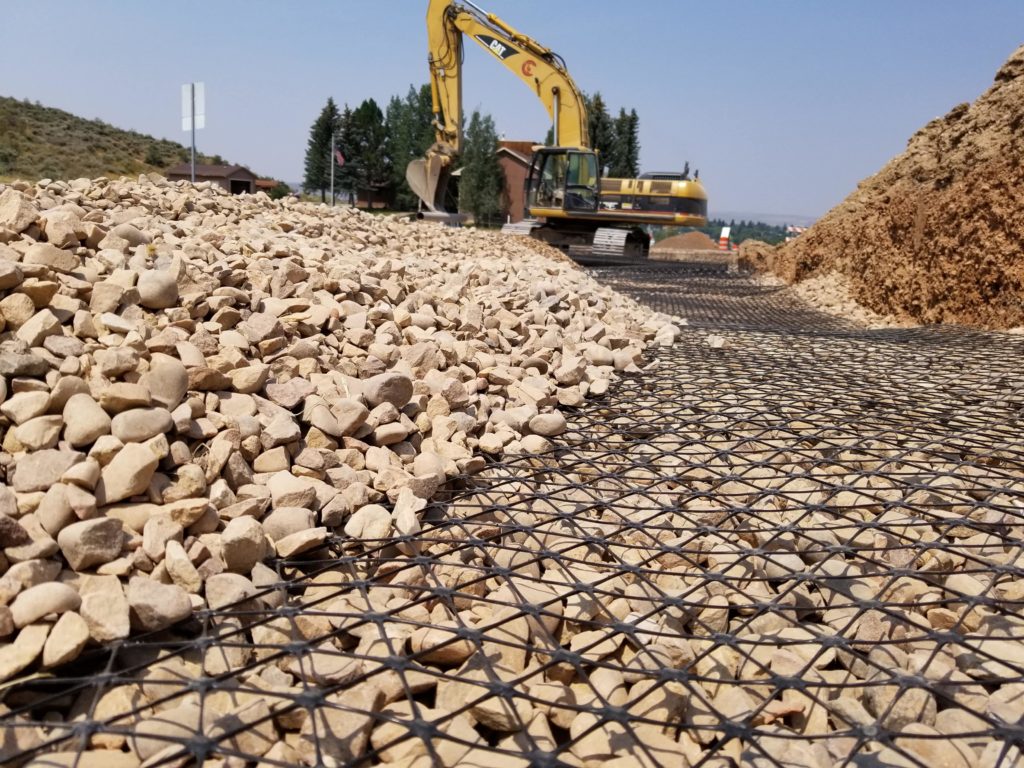
Geogrid is a geosynthetic material used to reinforce retaining walls, it increases the strength and stability of the building.
When using geogrid in a retaining wall, each layer should be overlapped by at least half of the layer’s breadth when it is laid out along the back of the wall.
The top junction points of the geogrid should be secured with pins or clips and the bottom joint points should be secured with nails or other fixing devices.
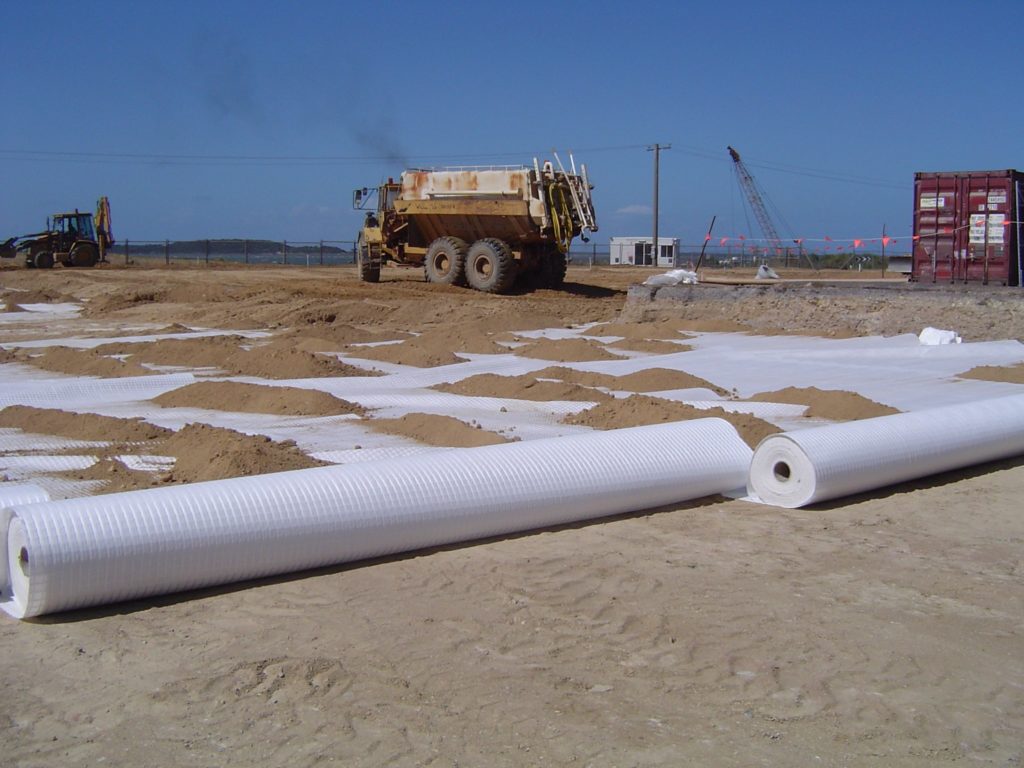
The geogrid should also be covered with a protective membrane such as a non-woven material to reduce UV deterioration and prevent clogging from dirt and debris.
To hold the reinforced soil mass together, horizontal geogrid layers give tensile strength.
A retaining wall system acquires a geo-reinforced soil mass, which increases the size and weight of the system and better withstands the pressures behind it.
Types of Geogrids Retaining Wall:
1. Uniaxial Geogrid- Geogrid for Retaining Walls:

This soil is used to support most walls.
High-tenacity polyester or polypropylene yarns are combined to form the material, then spun into a single yarn, knitted or crocheted to form flexible joints, and covered with a layer of latex or polyvinyl chloride (PVC) for added protection.
These geogrids are more flexible in terms of the finished material.
The retaining wall blocks are a great choice for positioning and compressing between two layers of retaining wall blocks because of their weight and locking mechanism.
If the right batter or wall setback is reached using geogrid in a segmental retaining wall application can raise the height at which a retaining wall can be build.
The length of uniaxial soil that must be retained perpendicular to the wall depends on the height of the wall, subgrade and condition of the soil, and weight of the retaining wall.
The geogrid usually permeates the backfill material of the retaining wall, which is a common type of angular crushed aggregate that goes into the structural soil beyond the retaining wall.
The soil of the retaining wall is strengthened by the holes, which stop movement and forces otherwise applied to the back of the wall.
It never overlaps during installation and at least 4″ must be added to the top for stability.
2. Biaxial Geogrid- Patios and Walkways:
The stability of aggregate foundation materials for pavement structures is the one application of this subsoil, which has strength in both directions.
The holes are made by punching holes through polypropylene that has been stretched in both directions to provide tensile strength.
As compared to the uniaxial geogrid, this grid is stronger and the holes are square.
Aggregates and dirt are forced in all directions by the load on the pavement surface.
Imagine stepping in the dust with your boots on.
As the boot is pushed into the mud, the mud that was previously beneath it moves up and out in all directions.
The same process occurs when dynamic loads pass over the pavement.
The pavement distributes that load to the base material and subgrade below.
Combined interlocking is accomplished by installing biaxial geogrids as deep into the ground as practical with a minimum 6-inch overlap between pieces.
This prevents the base material and subsequent subgrade from shifting under the weight of the paved surface.
3. Triaxial Geogrid– Driveway:
Tensor triaxial geogrids were developed to outperform biaxial geogrids in terms of performance.
Instead of squares, triangles served as holes and reinforced ribs, signalling change.
It can be installed at the bottom of the footing in soft soil applications to help stabilize the foundation material placed on top and spread the load over a large area.
It can also reduce the amount of excavation required for a typical installation.
Once again, this will require at least 6″ of overlap between each element and works superlative when buried as deep as practical in the base.
If the benefits begin to diminish after 12 to 14 inches, another layer of geogrid may need to be added.
There should be a minimum of 6 inches of material in the final triaxial geogrid layer.
If a stronger foundation is needed at the bottom of the paver, it can be placed 6 inches below the surface of the paver.
Despite the geogrid’s potential to serve as a layer separating the subgrade from the base, traffic may cause the subgrade’s high concentration of silt to erode into the base.
It is advisable to place non-woven geotextile as a separation layer just below the geogrid to prevent fines.
By placing the geogrid on top, the nonwoven geotextile can be gently stretched while still allowing aggregate to strike through the holes to create lockup.
4. Combigrid Composite Geogrid- Global Synthetics:
Another choice for a build geogrid retaining wall that combines biaxial stabilization and separation is called Combigrid, which mixes geogrid and geotextile fabric.
Flat polyester and polypropylene ribs are stretched and suitably oriented when they are passed by rollers moving at various speeds.
These are introduced into welding machinery, cross-machined, and welded together before being attached to a non-woven geotextile.
This device removes a phase from the installation of fabric and geogrid.
Instead of having to roll out two rolls in separate operations, this can provide the separation and stabilization that may be needed in heavy silt applications to stop the silt from creeping up into the base material over time.
How To Install Geogrid in a Retaining Wall?
- Once you have completed the first important steps in preparing the retaining wall, the initial layer of blocks can be placed.
- You can begin the installation by ensuring that your initial level of block is level and properly backfilled to the front of the wall (200mm or 8 inches is usually good for walls less than 1.2m).
- Make the first section of your drainage blanket.
- Fill the gap behind the wall with backfill material that is at least the height of the first block and the length of the installed geogrid. Geogrid Length = 0.8 x Reinforcing Wall Height
- After the backfill is properly compacted and reaches an even height, apply geogrid over the first block layer.
- After the wall is constructed, the edge of the geogrid on the lower block should be placed far enough forward on the lower block that it may not overhang from the face of the wall.
- If you have purchased biaxial geogrid, you can roll it out along the length of the wall provided the width of the roll is sufficient to satisfy the geographic length equation.
- If you have purchased uniaxial geogrid, you should cut it to the length you need so that the thick or stiff strips of geogrid are parallel to the wall (going into the blocks).
- After the first block layer is completely covered with a suitable length of geogrid, the second block layer can now be placed to secure the grid.
- The second row of blocks securing the grid makes it easy to wrap your subsequent drainage blanker entirely in fabric and then cover it with backfill to ensure that the grid stays tight.
- Keep the backfill compact.
- Add a third block row.
- The backfill block should be located and compacted to the height of row 3.
- Put the geogrid on the third row of blocks as you did in stages 1/2/3.
- Continue until you reach your desired wall height, making sure to compact each layer of backfill, create a drainage blanket, and add geogrid to each subsequent layer.
When Does a Retaining Wall Need a Geogrid?
- The soil and construction material of the wall will determine whether a geogrid is necessary.
- The most stubborn and uncooperative soil in existence is clay soil, which is common in Appleton, Neenah, and Fox cities.
- When the exposed wall height surpasses 24′, geogrid should be taken into consideration for the majority of 6′ or 8′ broad split-face limestone retaining walls.
- Based on the block design (and size), if there is an overload at the top of the wall, whether there is a slope at the base of the wall, a geogrid is necessary for most of the man-made retaining wall blocks at 36′-48′ exposed wall heights.
- Geogrid must be build when the retaining wall is at least 24 inches wide or is constructed of other similarly sized, thick material, over 6 feet high.
Benefits of Geogrids in Construction:
Construction Effort:
Any climate can be used to install the geogrid. That increases the difficulty.
Land improvement:
With the installation of geogrids in the ground, unsuitable terrain can be converted into an area with desirable qualities for construction.
Thus, groundwater helps in the efficient use of land.
Promotes soil stabilization:
The soil mass becomes stronger.
Greater load-bearing capacity:
It is a practical way to stop soil erosion.
No mortar is required.
Material Availability:
There is no problem with material availability.
The nature of geogrids is flexibility.
Less Maintainer:
They are known to be adaptable because of their exceptional longevity, geogrids require little maintenance.
FAQ- How to Build a Retaining Wall with Geogrid?
Q1. What size geogrid should be used for a retaining wall?
Geogrid Length = 0.8 x Reinforcing Wall Height
Therefore, you need geogrid layers that are 4 feet long and 5 feet tall.
Geogrid is commonly installed for tiny block walls and every other layer of blocks, beginning at the top of the lowest block.
Q2. How far back does a retaining wall’s geogrid extend?
The top geogrid layers must never overhang more than three units above the top of the wall.
Never place the bottom geogrid layers more than three units below the levelling pad.
At these points where 3-unit courses are surpassed, add a geogrid layer.
Q3. What depth is ideal for geogrid?
Before putting any rubber-tired or tracked machinery on top of the geogrid layer, backfill the area with soil at least 6 inches deep.
Driving equipment gently and turning gradually will help you avoid fill movement and grid damage.
Conclusion:
Geogrid is essential to the strength of reinforced retaining wall that can be build to be extremely sturdy using reinforced small block retaining walls.
Section Under: Retaining Walls